You may have noticed that there is a distinct lack of “toy” quadcopters that feature rate/acro mode. This is mostly due to them being sold as toys to people who want them easy to fly. For every one who wants to learn how to fly rate/acro mode, your in luck as a bit of cheap DIY and you are all set. I am in no way the person who did all the work for this. I am only trying to help spread the word for any one who would like to learn to fly rate/acro mode but dosn’t have a large budget.
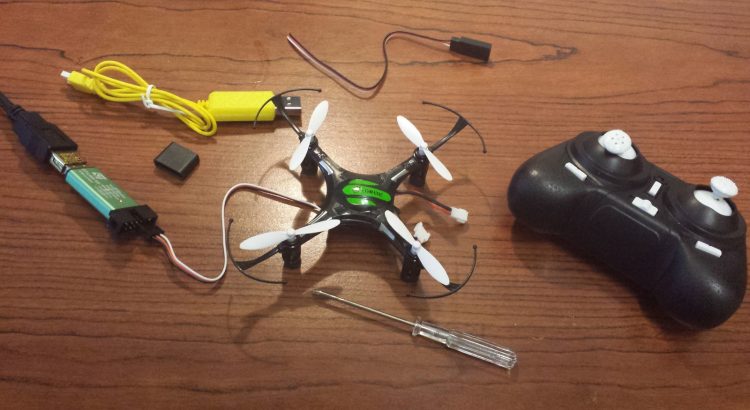
Required Parts:
Step 1:
Download and install the ST-Link V2 Driver
Note that to get the driver you will need to create an account. This is free and make sure to use a real email address as they will send you a verification email to activate your account.
Step 2:
Download and install the MDK-Core software
Again you will have to put in some information to get the software.
Step 3:
Disassemble the quadcopter using the screw driver that comes with it. Once all the screw have been removed leave the quadcopter upside down and carefully remove the bottom section of the frame.
Step 4:
Solder on your connections like so for the green board version of the quad.
- ST-Link SWCLK to CLK on the quad
- ST-Link SWDIO to DAT on the quad
- ST-Link GND to GND on the quad
If you have the blue board version you need to solder it up like so.
- ST-Link SWCLK to DAT on the quad
- ST-Link SWDIO to CLK on the quad
- ST-Link GND to GND on the quad
Step 5:
Now its time to get the correct firmware.
h8mini-acro – This firmware is for the green board version of the quad and only has rate/acro mode.
h8mini-testing – This firmware is for the green board version of the quad and has both rate/acro mode and auto level modes available (this is the one I am using).
H8mini_blue_board – This board is you guessed it for the blue board version of the quad and only has rate/acro mode.
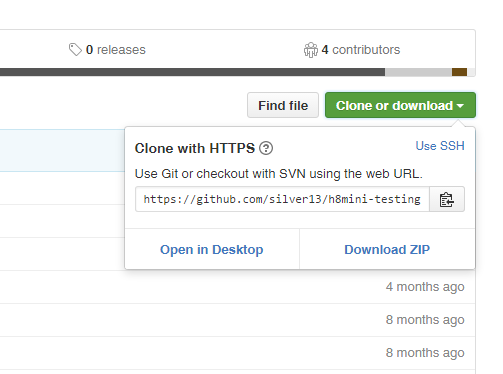
Once you have decided which you need you will click the green Clone or Download button and select Download Zip.
Once you have the firmware zip extract it where you can find it.
Step 6:
Go into the folder you just extracted and find the directory that starts with H8mini and go into there. Double click the Project.uvprojx file. This is going to open up the software you installed earlier and its going to ask you to add some packages to it. Say yes and let it download the packages. Once thats done it will open up and you will see the uVision software.
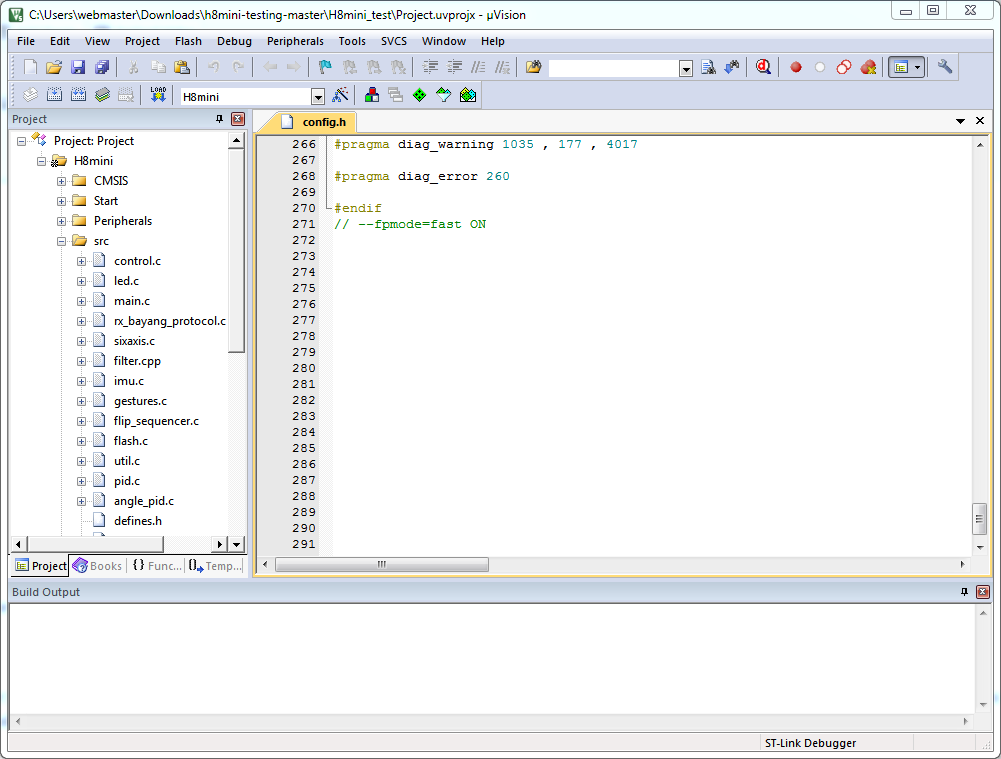
Note that it says ST-Link Debugger at the bottom
Step 7:
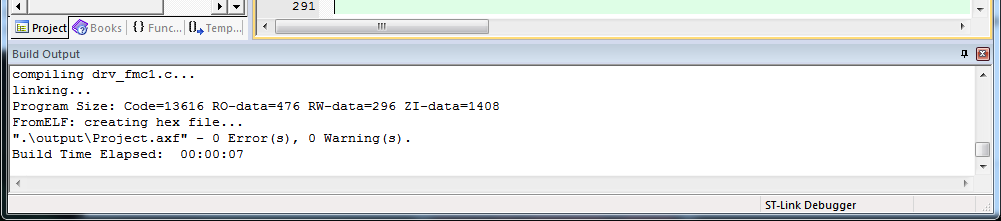
In uVision’s menu go to Project and select Build Target. This will compile the firmware and let you know if there are any errors. The Build Output should look like this.
Step 8:
This is your warning, past this point you can never go back to the stock firmware again.
Connect the battery to the H8 Miniquad.
In uVision’s menu go to Flash and select Erase and wait for that to complete.
Step 9:
In uVision’s menu select Flash and select Download. Wait for this to complete and you should have a brand new firmware on your quad!
Step 10:
Finishing up.
- Un-solder your connections or not depending on how you want it.
- Re-assemble the quadcopter.
If you are using the dual mode firmware you should calibrate the accelerometer
- Set it on a flat surface with the battery plugged in and turn on the transmitter (TX).
- Make sure the throttle and is all the way down.
- Move the pitch stick down 3 times within about 1- 2 seconds.
The only other thing to note with the dual mode firmware is how to switch between the two modes. This is done with the right stick (pitch/roll) in most cases.
- Left, Left, Down – This sets you into rate/acro mode.
- Right, Right, Down – This sets you into auto level mode.
Thats it but don’t forget to stop by the rcgroups thread to say thanks. There is tons more info and lots of support from the rc community.